
Bathroom renovations can be expensive propositions. With such a huge spread in pricing on tile and plumbing fixtures, it’s hard for many homeowners to know where to start. There are $200 faucets and there are $1,200 faucets. The same goes for tile; it can range from 90 cents to 450 dollars a square foot. And the overall price range of a bathroom remodel can vary just as greatly. If you’re on a budget — and not the kind that includes $400-per-square-foot-tile — here are a 7 features that elevate a basic bathroom to the next level without spending a fortune.

1. Add a decorative border. The white bathroom is as popular as the white kitchen, and basic white tile — whether it’s a 4″x4″ or 3″x6″ — can be really affordable. Mosaics can be pricey in comparison, especially if you want to do your whole bathroom in them. You can add some of their visual interest without spending a lot of money by using them in contrasting border. This technique has been around for a long time, as anyone with a vintage bath can tell you. Here, a double row of green mosaic glass tile up high on the wall, mixed in with a classic white subway tile, does the trick.

Many mosaic tiles come netted in roughly 12″x12″ sheets for easy installation. A great trick is to order half the linear footage you need for a border and cut the sheets in two.In this shower, a larger border closer to 6 inches tall in a long rectangular glass tile really stands out at eye level against all the over-sized white tile.
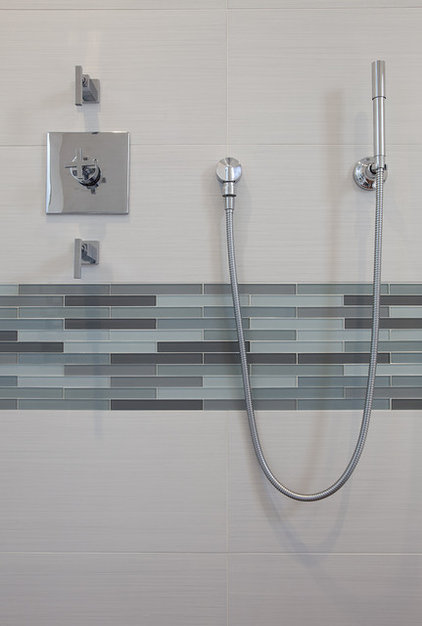
Mosaic borders don’t just create a focal point, they also help to define the locations of the shower fittings, which creates a design in and of itself.

A simple border of mosaic along the backsplash adds visual interest and ties the countertop material to the floor color (and makes it really easy to pick to a wall color). Here the tile is set right below a decorative cap tile.Tip: Decorative cap tiles and pencil liners can be expensive — usually priced per piece. If you’re on a budget, run a border of tile like shown, but rather than using a decorative cap, use a standard bullnose tile piece that is typically used to finish off the field tile. No one will notice you skipped the decorative cap; their eyes will go to the gorgeous mosaic.

Here the mosaic border runs along the top of the white tile wainscoting, and at this height, probably ties in perfectly on the vanity side to the backsplash.

Three rows of mosaics adds just a bit of texture and visual interest to the stone field tile in this shower. (Again, you can buy the mosaic in sheets and cut it down to 3 rows.)

Rather than a mosaic border, this bathroom uses a marble pencil liner as a border to finish off the top of the 3″x6″ basic white field tile. The Carrara marble pencil liner matches the marble floor tile and pulls it all together.

A simple dark contrast border of tile along the base near the floor adds just enough detail and elegantly ties in the dark floor at the same time.

A double band of dark pencil liner sandwiches a white marble mosaic border along the top of this shower. My eye goes straight to that detail so I barely notice that the rest of the field tile is large format (and therefore less expensive). This bathroom looks like a million bucks due to the creative use of line and the contrast of light and dark stone.Tip: Mix sizes of the same field tile. Here the floor is a 4″x4″, the bottom wall section is a 6″x12″ and the upper wall field tile is a 3″x6″, plus the mosaic border.

2. Create a feature wall If you’re not much of a border or stripe person, another great technique is employing a feature wall behind the sink (or on the back wall of the shower or tub as shown below). This requires more square footage of the more expensive mosaic tile, but still not as much as doing a whole bathroom!

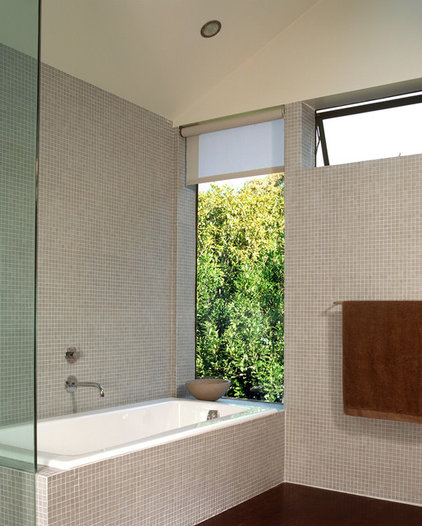
The way the tile is wrapped up the front of the tub and up the wall behind the tub defines this bathroom — it wouldn’t be as dramatic if it covered every wall. The wall washer recessed can lights also help to highlight this dramatic detail.

This feature wall of mosaic tile behind the tub makes the bathroom appear larger as well.

A feature wall behind the sink really makes a statement, and involves less square footage than a tub wall. Installing mosaic tile like this makes such a statement that you can feel free to tile the rest of the bathroom in a more affordable, basic tile and still not feel like you gave anything up!

This bathroom employs both a feature wall and a border. The border is great way to tie in the feature wall if you want both a modern and vintage feel at the same time.

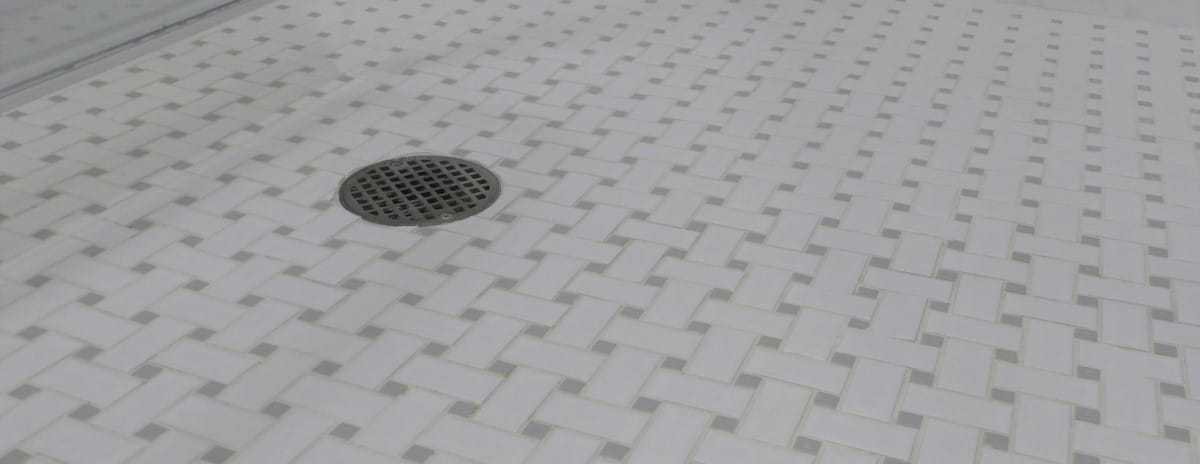
3. Create a feature floor. This is a personal favorite. Often bathrooms have less square footage on the floor than on the walls (especially if you’re considering wainscot tile), so go basic on the walls and splurge a bit on the floor tile. Here a graphic black and white basketweave makes this classic bathroom go from basic to beautiful — and that small mosaic makes the room look larger when used on the floor.

The 2″ marble hexagon tile on this floor is the splurge, and the basic white subway tile lets the marble mosaic steal the show. The addition of a modern vanity contrasting with the more vintage tile also adds visual interest.

This bathroom uses a border of field tile to frame the mosaic basketweave tile, saving a little bit of money. But, if you’re still looking to save some more, cut out doing the main floor and do the mosaic tile on the shower floor only.
4. Add beadboard or paneling. Wainscot tile square footage can really add up. If you can forgo it in lieu of wood beadboard and mix that with a feature floor tile pattern, you’ll have a winner.

Beadboard can be run up to the center of the wall or higher — there really aren’t any rules here. Running tile all the way up, however, would be a more expensive proposition.

A more formal approach, paneling accomplishes the same feel and budget savings as beadboard. Mixed with the marble mosaic floor tile and the stunning decorative mirror, this bathroom looks like it’s fit for a castle.

Jason Ball Interiors, LLC
5. Make a decorative statement. A unique tile design that really stands out can define a bathroom. I love this treatment; white subway tile in this case is the decorative element rather than the field tile.

The waterfall effect of this blue-green glass mosaic vertical border is wonderful for a modern bathroom.

For a vintage or classic bathroom, a frame created out of contrast tile on the shower wall is a perfect focal point. A runner created out of mosaic floor tile can be done if you’ve got the budget, but if not, an alternate idea would be to skip the inside mosaic and change it out for field tile and leave the frame.

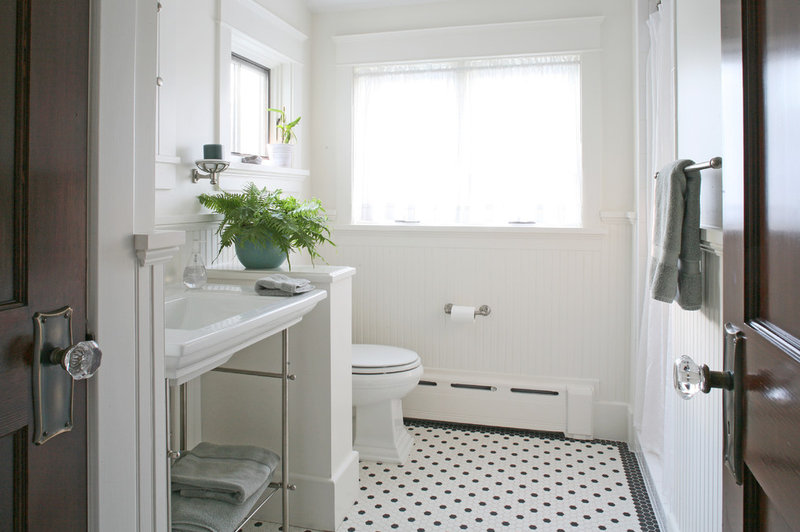
6. Add a bold wall color A simple and classic white bathroom with hexagon floor tile and white subway tile goes from basic to fabulous using an unexpected mocha wall color. Don’t be afraid to use dark wall colors when you have all that white tile — as you can see, the drama it creates is wonderful.
7. Go monochrome. Are you a minimalist and none of the bathrooms above do it for you? Go for the drama of all one material — and lots of it. Many glass mosaic tiles are quite affordable, you just have to know where to look. Go for it and do the whole bathroom.

An all-black bathroom is so unexpected that it makes a statement in and of itself. The stark white plumbing fixtures add to the drama. Don’t be afraid of running the tile to the ceiling — this black slate won’t break the budget.